Cake pops are a tasty delicacy that go well with anything. Crumble the dough when it’s ready and combine it with the creams. Shape into balls, place them on sticks, and embellish as you choose. This recipe is sure to please!
Ingredients for a ball of dough
- 300 g each of chocolate, sponge cake, basic dough, and sponge cake
- 50–60 g of mascarpone cheese
- 50–60 grams of chocolate Nutella
Decoration ingredients
- 250 grams of the best milk, white, or dark chocolate available.
- Two tablespoons of vegetable or coconut oil, any kind of sugar sprinkled on top
Cake pops up
I suggest purchasing premium cookie sticks, regardless of length. They are pretty and sturdy, and their diameter is just right to make the ball more stable.
It is best to place prepared cake pops inside a thin piece of cardboard or on a larger piece of styrofoam.
Step 1: Prepare the dough
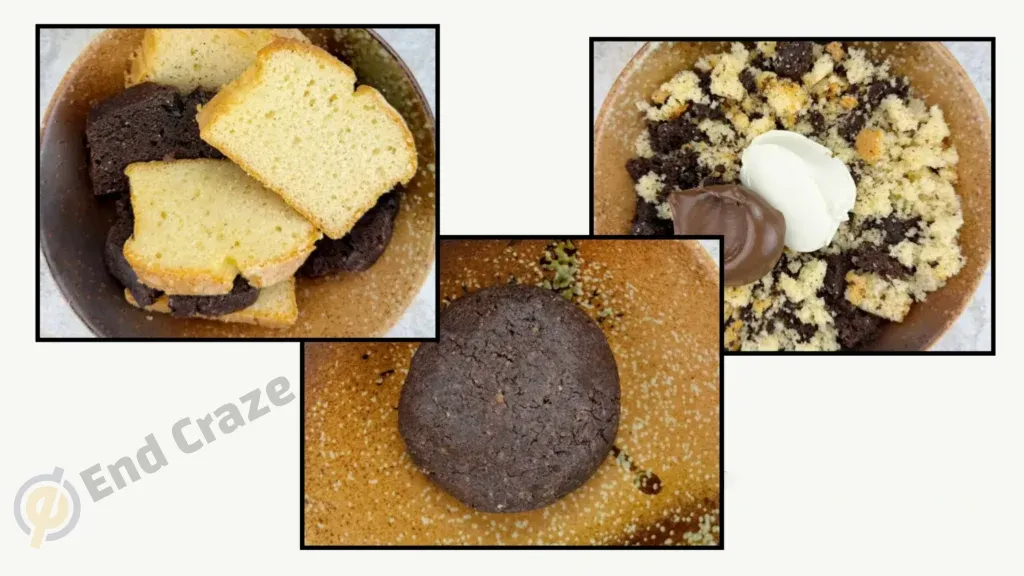
Cake pops are ideal for any cake that is baked in oil. It should be a plain cake or biscuit without any extra components like nuts or resins. As a result, biscotti, chocolate cake, or classic pound cake will work. You can only use a light or dark cake, or you can use a variety of different cake kinds.
Cake Pops: Cakes that are still edible after a few days can be consumed immediately or kept in storage for a few days. This time, I utilized a bit of light and dark dough that I had stolen throughout the dough-making process.
Step 2: Combine the cake with creams.
When the cake rises, use your hands to gently remove the pieces. Start by adding 50 grams of mascarpone cheese and your preferred Nutella chocolate cream to the bowl. Put on disposable kitchen gloves made of vinyl or latex and whisk the cake until it becomes smooth and elastic. If the cheese doesn’t seem to be soft enough to form into a ball, try adding up to 10 grams of cream cheese.
Advice: For every cake, use a slightly different dough. It is therefore worthwhile to progressively add cream cheese and cream as needed. The dough should be the consistency of soft plasticine.
Step 3: Mix and cool the cake pops up:
Form the sphere. Place in the freezer for twenty to twenty-five minutes, covered with a transparent food film or placed in a glass container.
Advice: Put your cake in the refrigerator if you intend to consume it all the next day. Put them in the freezer for 15 to 20 minutes before serving.
Step 4: Let the balls cool
Once the cake has cooled somewhat, cut it into 14 equal pieces. Curl them into balls with your hands. One ball, 30 grams in weight and 3.5 centimeters in diameter. Arrange the balls on a parchment paper-covered sheet. Freeze the sheet containing the balls for twenty minutes.
Step 5: Use sticks to stuff the skewers
While the balls cool, melt your choice chocolate (choose a portion from the 250 grams eliminated). Thirty grams of white chocolate was it for me. Keep this chocolate away from any oil. Stuff the dough balls onto the sticks using it.
Take the cooled dough balls out of the freezer using a baking sheet. Using a cookie stick, first create a tiny hole in the ball that is up to 8 mm deep. Once the skewer has been taken out, gently widen the hole.
Remember to hit the hole deeply, but not so deep as to pierce the opposite side of the ball, and quickly dip the tip of the stick into the melted chocolate (it should still be summer). A portion of the chocolate is absorbed within, while the remainder is adhered to the stick and ball on the exterior.
Place the ball with a stick sideways on the same tray as the paper sheet. Put each ball on the sticks in this manner.
Put the cake tray in the freezer for a full half hour.
Step 6: Pour chocolate over them.
Cake Pops: After the cake cools, melt the remaining hole preparation in the freezer with it. Steaming or using a heavy-bottomed pot on the hob’s lowest heat setting are two options. Chocolate should never be boiled or heated excessively, even if it is meant to melt. Lastly, pour in 20 cc of vegetable oil or up to 20 grams of coconut oil. Stir everything until thoroughly combined.
To dip the frozen popsicles into the chocolate, use a tiny, narrow dish.
After soaking the cake balls well, the chocolate may still be slightly warm. Allow the chocolate to trickle back into the plate. The chocolate on the frozen balls hardens rapidly, so sprinkle the pop-up cake right away with ready decorations like sugar shrimp or other decorations. Arrange the pre-made cookies stick-up on the cardboard, parchment paper, or styrofoam.
First piece of advice: if you don’t mind the chocolate breaking when you bite into the popsicles, there’s no need to add oil. Cake picks without oil are stronger.
Tip 2: You can use any chocolate droplets (marked “melted”) in place of plain chocolate; they melt more readily and come in a larger variety of colors, including pink and white. I’ll stop drizzling them with oil.
Step 7: Additional interior design concepts
You can alternatively dip the dough balls in white chocolate, followed by dark chocolate, and then swirl the stick around to create chocolate waves. Use finely crushed cookies, blue or white poppy seeds, colored frosting, freeze-dried and edible flower petals, and crushed fruit in place of sugar sprinkles.

Cake pops need to be refrigerated. Placing them close to one another and covering them with a lampshade from above is simple. If the dessert is made with fresh dough, it will remain fresh for several days.
Delicious.


